Getting Started

This business grew organically. I never intended to be a helpful online resource for van-builders, in part because my nomadic, climbing-driven lifestyle means that I’m rarely near good wifi for more than a day or two. However, as I posted pictures of my van on Instagram as every good millennial must do, I was inundated with questions from friends and strangers alike:
“How did you make that wood table so shiny?”
“How many solar panels should I use?”
“What are your thoughts on installing a 17th century iron-wrought bath tub in my Sprinter?”
This section of my website, which is always growing and changing, reflects the common questions that I get over and over again. A project of this magnitude can be quite daunting, especially when considering the endless amount of information and opinions sprinkled across the internet. Luckily, you’ve found the perfect spot to get started. These DIY pages will attempt to boil down the knowledge of the internet and my own personal experiences into everything you need to know to build the van of your dreams.
This is a big project:
Expect some sleepless nights, and to spend a lot of time, sweat, and maybe tears on this project. However, I’m hoping this website can prevent most of the tears. The vans pictured on this site take about 400+ hours each—and I’m not a novice builder. If this seems like too big of a project, I don’t blame you. If you have a busy life and don’t have a spare 400 hours in your schedule, drop me a line and I’ll build one for you.
A note on links:
Throughout this DIY section, I’ve included amazon affiliate links to the many products you will need to purchase during each phase of the build. If you find something you need simply click on the photo and you will be redirected to Amazon. These product links sometimes change or expire, and prices can change so please let me know if any links are not working properly or if there is something you found useful that is not listed. A lot of products that go into van builds are found on Amazon and Amazon Prime’s two day free shipping is an amazing resource. I would strongly recommend signing up for a Prime account if you haven’t already. Try Amazon Prime 30-day free trial by clicking below.
Thanks so much for reading. Now let’s get started.
A few tools you’ll need:
Before you actually go about building the van, there are a few tools that you will need throughout the build. If you’ve already got a workshop setup dialed, feel free to skip this section. If you’re new to carpentry, pay close attention.
Click on the photos for more product information.

Worm drive circular saw. This saw will outlive you if you take care of it.
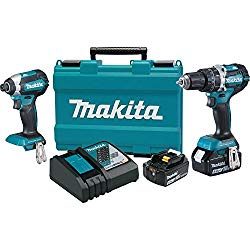
Professional grade drill and driver. Low profile driver is great for working in small spaces.
The majority of any build will be done with three tools:
A drill
An impact driver
A circular saw
A simple build can be done exclusively with these three tools. Pictured above are exactly what I use, and I am personally very happy with them. It’s worth noting that these are on the expensive side, but when it comes to tools, quality makes a big difference, and these tools will last for decades if you take care of them properly.
The Makita drill and driver set I use includes a drill (for making holes) and an impact driver (for driving screws). Having both is strongly recommended. If you are low on funds and the Makita is out of your price range, Ryobi offers significantly cheaper options, though at some point you will probably wish you had the good stuff.

Sidewinder saws are less powerful than worm drives but much lighter and cheaper.
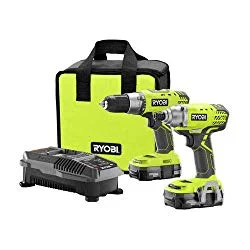
Cheaper drill and driver set.
A van is not built solely with Power Tools:
Of course, a van build isn’t just built with a drill and driver, and a tool belt will help organize your smaller tools—pencils, tape measure, speed square, etc.—and make building astronomically easier. Here are a few things I keep in my tool belt that I would consider essential:
Tape measure
Speed square
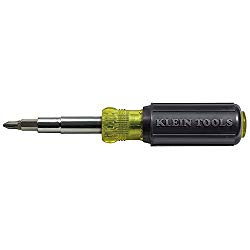
Screwdriver
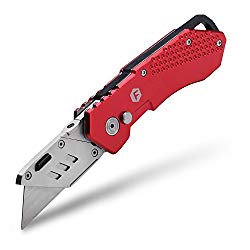
Exacto knife
Chisel
Scribe
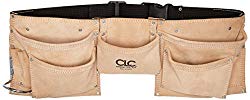
A tool belt is highly recommended. They really help for staying organized and keeping the most utilized tools at the ready.

Probably the best tape measure on the market.
Another essential item, make sure to close it when not in use.

Chisels are great all round utility tools.

A speed square is a perfect guide for square cuts and squaring up joints
Super useful for all sorts of things, van building and beyond

A scribe is used to trace around curves and more difficult cuts to get the perfect fit.
Thinking Beyond the Tool Belt:
There are a few other purchases that will go a long way to help you prep for your build-out. In order to have ample electricity for all of your tools, definitely invest in a power strip (or yank one from the home office to save some dough!). Also, an extension cord will allow you to bring tools into the funky cracks and crevices of your van.
A framing square is another essential—this helps you line up right angles and is indispensable throughout your build. A set of wrenches is also a great idea—you never want to have to drive to the hardware store simply because you don’t have the right size wrench for the job at hand.

Power tools draw a lot of power make sure to get a thick power cord.

Use a framing square as a smaller straight edge and to square up corners.

96 inch entry level straightedge
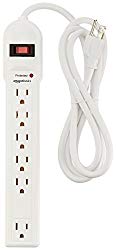
A power strip will make your life easier.

Good tools to have around and in life.
With straight edges you get what you pay for. Cheap ones might not be perfectly straight. The lower your error tolerance, the more you need to spend. Prices can range up to $200 and expensive straightedges should be purchased at a hardware store to avoid damage during shipping. Long straightedges can also double as cut guide.
There are a dozens of other tools that you may end up needing throughout the build, but that namely depends on what route you go in terms of materials, design, error tolerance, etc. The above tools are the bare bones to get you started, so get your driveway or garage prepped for the challenge ahead. Now then, onward!
READ NEXT: Buying a Van