Insulation

How to insulate a van might be the most debated topic on the internet. I have read many different perspectives: some offer great advice while others are filled with BS. Below I will share how I insulate vans and why.
My credentials? Over the last 5 years, I’ve van camped in temps ranging from -10 to 110 and came out just fine. Of course, if you are a powder hound and will be chasing winter storms, you will want to go above and beyond standard insulation (or at the very least get a nice heater).
Step 0: We’ll get things started with an optional step, sound deadening. A lot of people make this seem like it’s super important, and it does help reduce road noise created by your van. However, once your build is finished, hearing only the noise of the van would be a godsend. Most of the noise you will hear will be created by all the things you put inside the van, i.e., the silverware, oven racks, cooktop, and things bouncing and sliding around. So for this step, follow your heart. If you do want to sound-deaden your van, this is a good product:
Click on the photos for more product information.
80 mil, 36 square ft
Step 1: Prep walls by painting over any exposed metal and make a game plan.
Wall insulation is highly dependent on how you plan to build your walls. There are 2 basic strategies and no right answer.
Option 1 is to fur out the walls so they plane evenly with the rest of the wall.
Pros: you get a flat wall with clean corners which make the rest of the build easier.
Cons: you loose a few valuable inches.
Option 2 is to curve the walls around the proud beams.
Pros: This approach maximizes space.
Cons: It makes the build (particularly cabinets) more challenging.
My preferred layout requires sleeping sideways, so every inch matters. Because of that, I take the more difficult path and build around the curves. Either way, start by furring out the more recessed vertical van supports. I use 2x3’s and metal-tapping screws.
Pro tip: Make sure to size your screws properly so you don’t drill holes to the outside!
Step 2: Select your insulation product(s). This is where it gets hard as there is a lot to choose from these days. The most popular options (not in order) are foam board, spray foam, Thinsulate, mineral wool, and sheep wool. Here are my thoughts about each product:
Foam board: I love it. It’s cheap, easy to install and I believe it has the highest R-value per inch of material (R-13 for 2 inch board). Additionally its ridged which is also a plus (more on that later). Find it at your local hardware store.
Spray foam: I use it but I don’t like it. Some people decide to do their entire van with spray foam because it is a great insulator. I don’t like it because it’s on the expensive side, it can be hard to work with, and its rather toxic. I use it to seal in the larger pieces of foam board and fill small gaps. Find it at your local hardware store.

Thinsulate: It’ great stuff but expensive for R-5.2. Thinsulate can be found on Amazon:

I recommend the 50 x 60 option for a sprinter style van.
Mineral wool: I have no experience with mineral wool but I have heard great reviews. I would use it to fill beams and odd little spaces. Find it at your local hardware store.
Sheep wool: Really good stuff but its not cheap. I prefer it to mineral wool for its moisture managing properties. However I would not recommend using it on larger wall spaces as it will eventually all end up at the bottom. I used 2 full bags of Havelock Wool to fill beams and odd spaces in the latest van.
In my current van (a dodge promaster 2500) I used a combination of foam board, spray foam and sheep wool. Foam board isn’t as trendy as some of the other options but it has the big advantage of being ridged. I use 2” thick on the walls and 1” in the ceiling. The foam board gets sealed in place by spray foam and if you do it right you get free insulation by creating an air tight seal and trapping dead air space. I also use spray foam to fill the smaller beams. Lastly I use sheep wool for filling the larger beams and in door compartments that have moving parts.
If you are looking to cut costs (like I was on my first van) Pink Panther insulation is a good option for odd spaces. If you use this option wear gloves and long sleeves to avoid irritating your skin during installation. Some people worry about this material getting moldy. It is not organic and won’t mold on its own but it can collect sawdust during the build process, which can support mold. I think the jury is still out on this one. If you are in a moldy area, maybe look for alternatives (and let me know if you find a good one) or buy extra spray foam. I spend most of my time traveling up and down the American west and I’ve never had any mold issues. Pink panther can be found locally or on Amazon:

23” x 25 ft. R30
Step 3: Install your insulation, foam board in my case. Cut pieces to size and position in wall recesses using a prop of some sort. The 6 ft 2x3’s I use to support the bed work great for propping up foam board on the ceiling (pictured above). Leave about a half inch gap on all sides and fill the gaps with spray foam. Pick up foam board and spray foam (branded Great Stuff) at your local hardware store. You will probably need 8-12 12 oz cans of Great Stuff depending on your efficiency. Some stores sell 16 or 20 oz cans.
Step 4: Fill the beams. I use spray foam to fill the smaller beams. When it comes to larger beams like the vertical ones in the rear corners, I like sheep wool but mineral wool or Pink Panther also works.
Step 5: Insulate doors. Most of the space within the doors is perfect for ridged foam board and spray foam. Some doors have moving wires and things to make the door open, close, lock, etc. In those areas the spray foam and foam board won’t work. Use your preferred squishy insulation for these areas as it allows the moving parts to move. Lastly, I stuff more squishy insulation in any and all nooks and crannies.
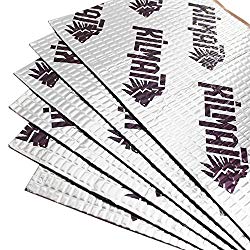
Step 6: Take your insulation to the next level by covering everything in reflective bubble foil secured by foil tape. When installed properly with air gaps on both sides, the reflective foil is a very efficient, lightweight insulator. If it’s squished between other materials it is basically useless, so I consider this step optional. I also use reflective foil to cover the wheel wells in the back. Reflective foil is much cheaper online:

48” x 25 ft

48” x 100 ft

Aluminum tape used for securing the reflective foil
Floor insulation will be covered in the Flooring section.